English




Quick Answer
Curved marble panels are made in three main ways: machining the shape from solid stone, assembling pieces cut from flat slabs, or producing a curved panel with a thin marble face and engineered backing.
The choice starts with the part you need. A counter with deep carved returns calls for a different approach from a marble facing around a column. Both may look substantial from the front, but the amount of stone, joints, support and installation work can be very different.
This guide explains how the methods compare and what to include when asking a supplier to price your design.
Contents
A conventional marble slab is not simply bent like sheet metal. The curve is cut from the stone, built from smaller pieces, or formed using a purpose-designed composite system.
The fabricator starts with a block or thick stone blank and removes material to produce the curved profile. The face, edges and returns are then finished.
This route suits shapes with deep returns, sculpted transitions or exposed sections that must be marble throughout. The starting blank needs to accommodate the full shape, including material that will be removed during machining.
How much stone is used depends on the geometry. A shallow curved section and a deeply sculpted counter can have very different material requirements, even if their visible face areas are similar. Larger installations may also need several machined sections joined on site.
The fabricator divides the curve into narrower pieces, cuts their edges at calculated angles and assembles them on a suitable support.
The finished face can take two forms:
A smooth face still contains joints between the original pieces. Their visibility depends on the stone, joint treatment and finish.
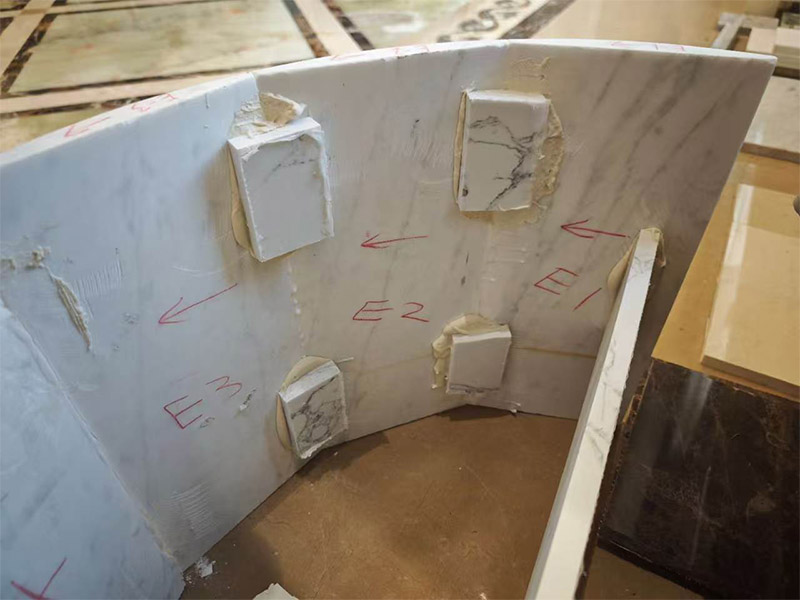
Slab-based curved marble assembly.
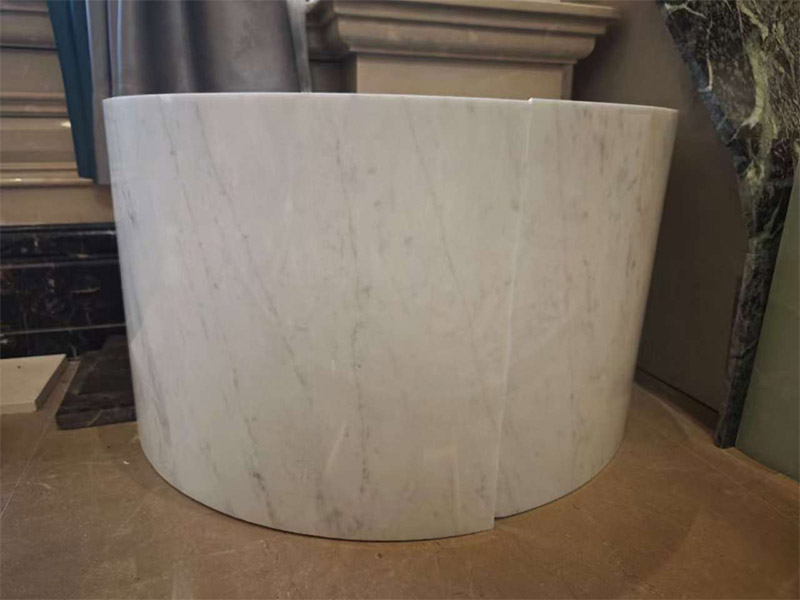
Separate stone pieces form the curved facing.
If a quotation describes “segmented curved marble,” ask which finish is included. Cutting and fitting flat segments is a different scope from assembling them and then shaping the face. For a smooth result, the fabricator must leave enough stone for profiling and coordinate the segment layout with the support.
Working from slabs also allows the vein sequence to be planned before cutting. This can be useful when a curved wall or counter front needs to follow the pattern of selected material.
A curved honeycomb panel combines a thin natural-marble face with a lightweight core and backing. The panel is manufactured as a curved assembly to suit the approved geometry.
This construction is worth considering for wall cladding and column covers where weight matters. The marble remains visible at the front, while the backing provides much of the panel’s overall depth. Exposed ends need a designed edge or return to achieve the intended appearance.
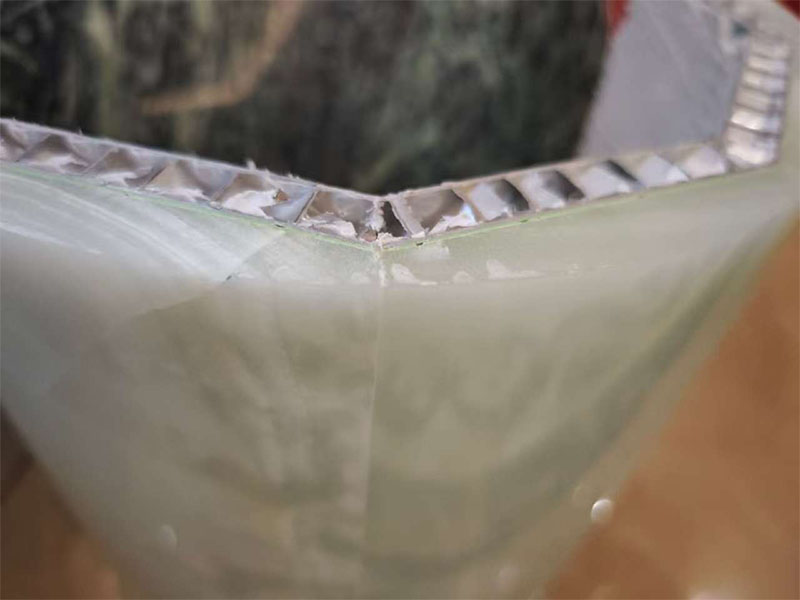
Backed curved marble panel construction.
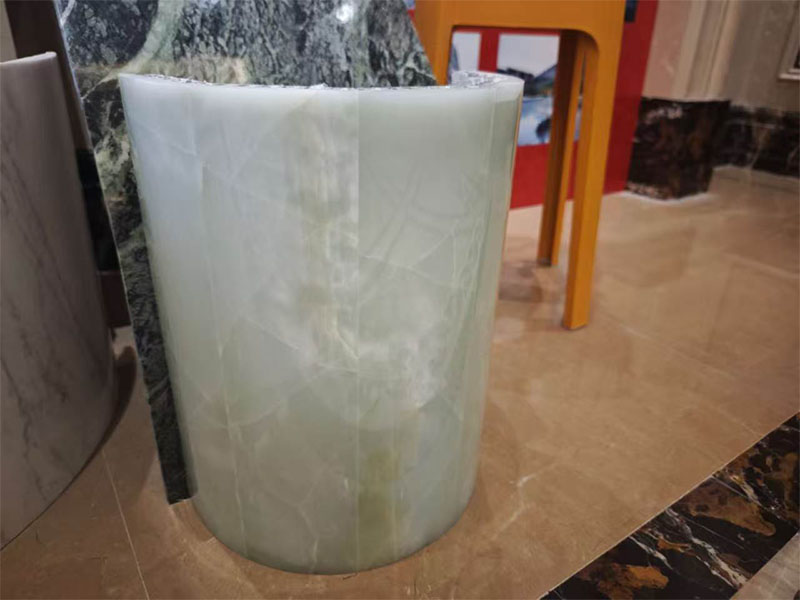
The backing is part of the complete curved panel assembly.
Order this as a curved panel system. A standard flat honeycomb panel should only be bent on site if its manufacturer explicitly permits that use and provides a forming procedure.
Panel construction and installation layout are separate decisions. A curved wall can use several honeycomb-backed panels, with joints between them, just as it can use several solid stone sections.
Start with the details that cannot change: the shape, exposed edges, acceptable joints and available support. Then compare the routes that can meet them.
| What the design requires | Method to consider | Detail that needs attention |
|---|---|---|
| Deep sculpted returns or exposed sections that must be stone throughout | Machined solid marble | Starting material, finished weight and handling |
| Curved facing made from selected slabs, with treated joints acceptable | Slab segments assembled and finished smooth | Vein layout, joint treatment and profiling |
| Deliberate flat faces around a curve | Faceted slab assembly | Segment width and joint positions |
| Natural-marble facing with a strict weight limit | Engineered curved honeycomb panels | Backing, exposed edges and connections |
For round column cladding, check the complete circumference and the position of vertical joints. The finished outside diameter must leave enough space for the cladding and its support around the existing column.
For curved walls, look at the elevation and the route into the building. Panel divisions need to work with doors, ceilings and lighting, while the pieces must be practical to transport and handle.
For reception desks, close-view details often decide the method. The junction between the top and front, the end returns and any exposed stone sections deserve early attention. If these details require stone throughout, machining from solid stock may be appropriate. If the design needs only a curved facing over a separate structure, slab-built construction is also worth pricing.
Exterior cladding needs a separate assessment of the stone, backing, anchors and supporting system for the project’s exposure and performance requirements.
There is no universal minimum radius or standard thickness for curved marble panels. The workable dimensions depend on the stone, fabrication method, panel size and support.
A radius on a drawing should identify the surface it describes. The finished marble face, panel back and support follow different lines. For changing-radius or double-curved shapes, sections or a 3D model may be needed to explain the geometry.
Thickness also needs a clear definition:
A finished solid section may need a much thicker starting blank to contain its curve. On a composite panel, the overall thickness tells you little about the thickness of the marble face.
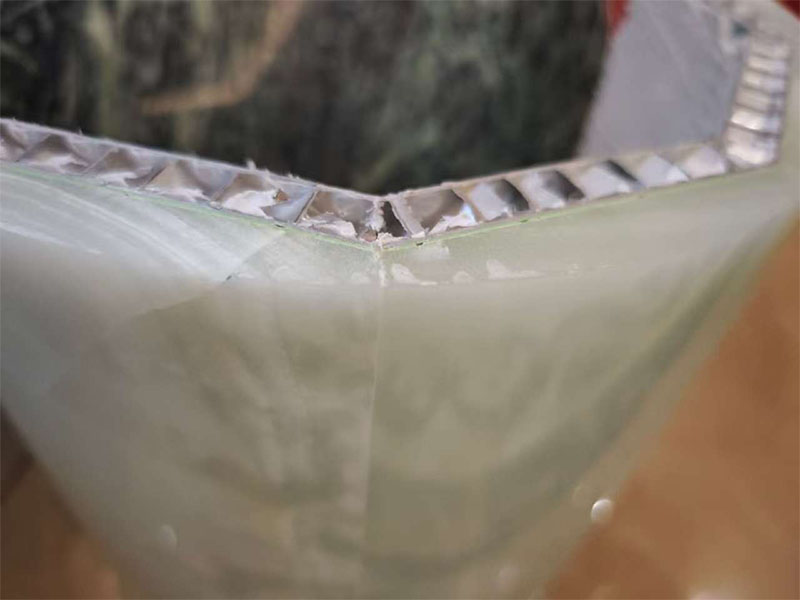
Backing and stone facing form the finished panel construction.
Panel width changes the result too. At the same radius, wider flat segments produce more noticeable facets. Narrower pieces follow the arc more closely but add joints. If the face will be ground smooth, the cutting layout must leave enough material for that work.
Where the combination of stone and geometry is unfamiliar, a trial piece can settle questions that a drawing alone cannot answer.
A curved marble surface can look smooth without being made from one piece. It helps to separate three things when reviewing a sample:
Slab-built and composite panels can create a continuous-looking face, but assembly joints may remain visible. Machined solid sections also have joints where separate components meet.
Vein planning starts with the actual slabs allocated to the order. A flat layout shows the intended sequence, but further profiling can expose stone at different depths. For a design that depends on the pattern, review a finished section as well as the slab layout.
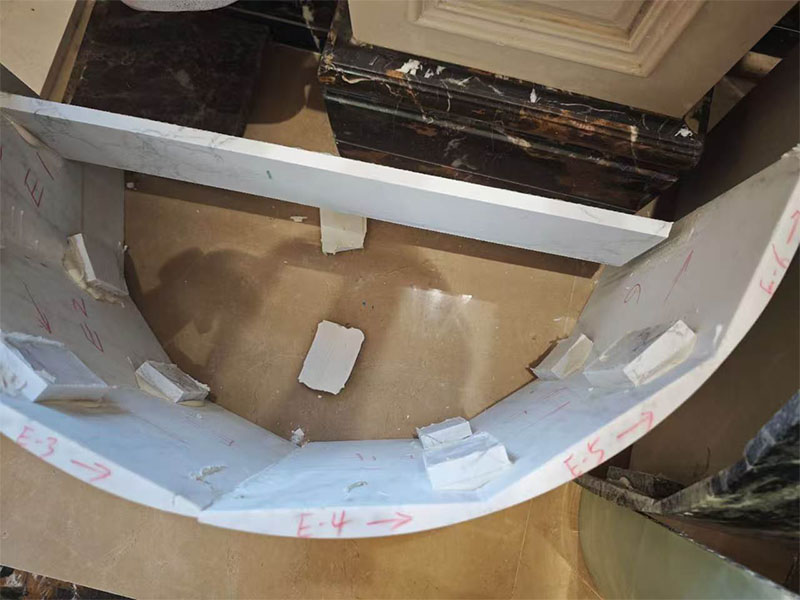
Segmented curved marble construction, photographed during production.
For appearance approval, include a finished joint or exposed edge in the sample. A photograph of the middle of a polished face will not show how those details look. Side lighting and views along the curve are particularly useful when checking changes in reflection.
The slab price is only part of the cost. Curved work may add shaping, fitting, joining, finishing, backing and trial assembly.
For solid machining, the starting blank and amount of material removed can be major factors. The finished weight may also affect packing, handling and transport.
Slab assembly can use less raw stone, but requires angled cuts, fitting and joint treatment. A smooth face adds profiling and finishing after assembly. A honeycomb construction uses a thin stone face but adds core materials, bonding, edge treatment and any forming or testing required for the system.
A small machined part may cost less than a custom composite assembly, even if the composite uses less marble. Compare the actual finished components rather than ranking methods by stone consumption alone.
A quotation should make the following scope clear:
Also check how the quantity is measured. Finished curved face area, purchased slab area and a price per component are different bases.
If the price needs to come down, ask the fabricator which design changes would make a meaningful difference. Revised panel divisions, simpler returns or repeated shapes may reduce some work, but can change the joints or installation sequence. Review the proposed appearance and site work alongside the saving.
Send plans, elevations and sections, with a 3D model where the shape needs further explanation. Include:
You do not need to choose the fabrication method before making the enquiry. Ask the supplier to propose a route and explain why it suits the design.
Where two approaches look practical, request quotations for both against the same appearance and delivery requirements. This makes the differences in cost, weight and site work easier to assess.
Confirm the final drawings, selected stone, panel divisions, joints and exposed edges. Agree who will verify site dimensions and how the panels connect to their supports and adjacent finishes.
The allocated slabs or blocks should suit the planned cuts. Natural fissures, existing repairs and vein direction deserve particular attention where they intersect narrow sections or detailed edges.
Choose a sample that addresses the main uncertainty. That might be two pieces meeting along a curve, a treated joint under close lighting, or the end of a composite panel. Record which details the sample approves. Review backing and connections separately if they are not included.
Before shipping, check the pieces against the approved layout. Where appropriate, assemble them for a trial fit. Mark each component’s position and orientation, and use the same panel numbers on the drawings and packing list.
Planning a curved marble project? Send Excellent Stone your drawings, preferred marble and finish, and any requirements for joints or exposed edges. Our team can review the design, discuss fabrication options and prepare a quotation.
Categories
New Blog
 ROOM 205,NO.45, MIDDLE HAIJING ROAD,XIAMEN,AREA OF PILOT FREE TRADE ZONE(FUJIAN)OF CHINA
For inquiries about our products or pricelist, please leave to us and we will be in touch within 24 hours.



© Copyright: 2026 XIAMEN EXCELLENT STONE CO.,LTD. All Rights Reserved.

IPv6 network supported